Tuesday, May 22, 2012

April and May 2012 are together.

It has been so long since I took this picture I don't remember who made this beautiful quilt but here it is.
Embroidery detail from someones show and tell. 

Here's Jan Magee showing off her piece for the June challenge. The fabric for the challenge was of course the bright border print. It looks like she might have hand quilted this little project. Ann seems to really be enjoying herself, Just look at that smile.
I'm sorry I don't know who did this one either because they were hiding behind their quilt. I think it is beautiful.
This little quilt was done by Violin to demonstrate the use of her accu-cut quilt and go machine.
There Viola is again with her own free motion quilting project. I can't wait till I can retire and stay home and work on fun projects!

Ann brought a darling quilt that is storey book pages. Great job Ann!

Patsy brought her challenge quilt. I don't know where she gets the time.

Here is Ann Ferris sharing her latest quilt with us. She offered to do a class on curved piecing I think.


In June, I believe we are to all have our challenge quilts. (I have not even started) and we were going to discuss doing the half square triangle swap. If you did not get my email, here is the link to the online show where I got the idea. http://www.thequiltshow.com/os/shows.php/episode/802 It's all the quilt show and it is Edita Star teaching her method. My paper that I have uses 8 1/2 by 11 sheets but the the theory is the same.  I think her quilts are beautiful. I think I have watched this show maybe 4 times now. As I had to see it again since I went to pull the link for the guild.

'till June Happy Quilting everyone!

Please leave comments or email me if you can put a name to a quilt I will do the addition or correction as soon as I can. 

Tuesday, March 20, 2012

March 19, 2012 Meeting

We had a great meeting this month. Several members brought quilts to share with us. Here are all the ones I was able to photograph.
Becky and Brenda are shown here with two of Brenda's wonderful quilts.
Ann Ferris brought us a fine example of the piping/binding method that she taught us this evening. The squares are Redwork and the quilt was bound  using the Piping Hot Binding method that she learned at a class that she went to, taught by Sue Cleveland. Sue's website is www.Piecesbewithyou.com

Connie Mulliken brought us her Medallion Star quilt.

Becky and Georgia are sharing this beautiful sampler quilt that was pieced by Georgia and quilted by Becky.
I wish I had gotten more of this beautiful quilt into the picture but we sure did catch Georgia with a great smile. Thanks Georgia!
I'm sorry but I don't remember who did this uneven nine patch but it sure is pretty!

This table runner is an excellent example to the the "Cotton Method" of quilt making I'm sorry I don't have the name of the quilter.
This quilt was fused and machine appliqued.
This on was machine embroidered and then machine quilted on a domestic machine. 

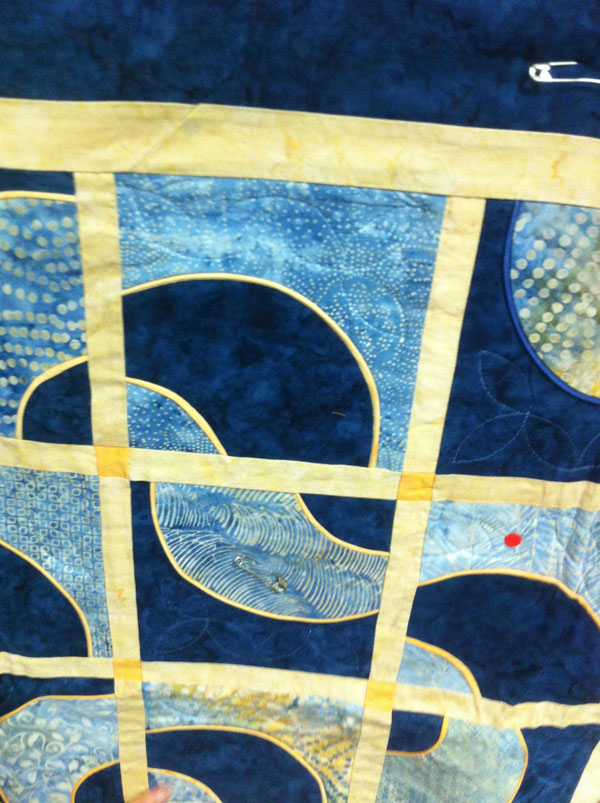
Beautiful curvaceous quilt, don't remember who did it. Sorry email me and I will update.
This is a close up of the quilt that show the use of the piping hot binding used in the main design of the quilt, it sets off and defines the colors.

Piping in Quilt Binding

Based on method taught by Susan Cleveland. The supplies can be purchased on her website.
  1.  Layer backing, batting and quilt top. Machine stitch around the edge with a walking foot to prevent the quilt stretching during quilting. Quilt. Do not trim off the excess batting or backing yet.
  2. Cut enough 2 1/2" wide binding strips to go around the quilt plus about 15". Join them together by sewing diagonal seams.
  3. Cut enough 11/4" piping strips (on the 45 degree bias) to go around the quilt plus about 15". Join them together by sewing diagonal seams The piping fabric should be a strong contrast to the border and binding. 
  4. Press the piping and binding strips along the length, wrong sides together.
  5. Steam the cording to pre-shrink it.
  6. Make the piping. Trim the piping seam allowance to 1/4" 
  7. Apply the piping to the top of the quilt sandwich. Use a bobbin thread that is different from the thread used to stabilize the quilt and contrasts with the quilt backing. Sew directly over the piping stitching line. At the corners allow the piping to run off the edge by about and inch. Be careful not to catch the cording in the stitching.
  8. Patsy sewing her binding on 
  9. Slowly and carefully trim off the extra batting/backing /piping even with the cut edges of the piping.     
  10. Lay the binding over the piping so the tail is about 10" ahead of the corner. pin in place.
  11. Leave about 8" of loose tail and begin stitching, with the backing facing you, near the corner of the quilt. Stitch one thread to the left of the stitching that attached the piping to the quilt. Stop at the intersection of the piping stitching lines and back-stitch. Remove the quilt from the machine and cut the threads. 
  12. Miter the cornet and continue with the next edge. And so on around the quilt. Stop approximately 10" before reaching the starting point.
  13. Lay the tails on top of each other so the overlap is 2 3/4". Join Complete attaching the binding. 
  14. Wrap binding to the back of the quilt and stitch in place.

Connie trimming her binding with the special grooved ruler.
I wish I had more pictures because it really was a good class but I think I got involved in learning the technique and forgot I meant to take pictures. 

The dip and cookies were out of this world many thanks Connie. I don't know what you put in those mud cookies but they were sooooo good! What was different? It was my cheat for the week ...... at least till I order pizza Friday night. 

Everyone have a great month. Hope to see you all back at guild. Your comments and emails are appreciated. I know I make mistakes so please help me before whoever name that I misspell or quilt that I mislabel sees it! Eeeek!


Friday, March 9, 2012

February 2012 Meeting

Cindy brought a new quilt of valor that she made. 
I love these next two quilts. 


Once again my camera did not do justice to one of Jan's quilts. 

She incorporated Chinese characters into her hand quilting design. 

Ann's Truck quilt for Tykes was Darling.

Patsy's Paper Doll quilt was darling

Brenda brought three of her beautiful applique quilts


Lillian taught  a class on how to make a 10 minute table runner. 


I do my best to put the right names with the quilts but with it being tax time for my family I had to put posting  on the back burner till I could get out from under them. I think after two days home from work I am at last done.  I received Ann instructions some time this week  and will post them below. 

Here is the email she sent me. We will be learning how to put piping in the binding of a quilt.
If all this is too complicated for you please come to the meeting anyway and allow me to demonstrate it.
 
Please quilt the layers prior to the class but do not sqare up the piece or trim the batting or backing.
 
Ann
 
Piping Hot Binding Supply List


Fabric requirements: (does not have to be exact because this is a sample piece)
  • 13" x 13" fabric for quilt top, may be a cheater block
  • 14" x 14" fabric for backing
  • 14" x 14" thin cotton batting
  • 1 1/4" (1.25") bias strips adding up to at least 70" for piping ... High contrast to quilt top and binding ... If cutting bias is new to you, wait for class
  • 2 1/2" (2.5") straight of grain strips adding up to at least 70" for binding ... May be same as quilt top
  • Ann will provide the cord for piping
Supplies/tools:
  • Sewing machine.  A machine with adjustable needle positions is desirable.
  • Slotted needle plate for your machine (not single hole needle plate) If you have no idea what this is, you're probably OK. It came with your machine but some quilters change it to a single hole needle plate.
  • Walking (or even-feed) foot if you have one
  • Foot with a small groove in the bottom from toe to heel (highly recomended) for making piping OR zipper foot OR pintuck foot OR corded buttonhole foot (Pfaff plastic applique foot or narrow piping foot; Bernina foot #3 or #23; Viking foot C or mini piping foot; Janome beading foot)
  • Open-toe foot ... important
  • Rotary cutting mat...at least 18"and cutter (may be shared)
  • Thread to match piping fabric
  • 2 filled bobbins with different color thread (one should contrast with backing fabric)
  • Ruler – ideally 6”
  • Small scissors
  • Pins
  • Seam ripper
  • Post-it note pad (about 10 sheets of any size as a guide on the machine)
  • Ann will provide masking tape

Irons and ironing boards will be needed, though not every student needs her own.


Friday, January 20, 2012

January 2012

Our January Guild meeting was a lot of fun. We had show and tell. Where Becky showed us that she had completed quilting the two quilt of valor quilts that we made this summer. She did a great job! Thanks Becky.

Completed Quilt of Valor  quilt.
Next we saw a quilt made by Connie. It was from Lillian's four patch one cloth quilt class. I like the way she set off each individual kaleidoscope block.

Lillian brought her new disappearing nine patch that she quilted on her own mini long arm setup. 
Mary Ann had the sunflower quilt that was based on the Dresden plate pattern. 
Patsy, who was our instructor tonight brought her darling 3D pinwheel quilt. I caught her peeking over the top of the quilt. 
Jan McGee brought her new Hawaiian  style quilt for us to see. 


Patsy taught us how to make microwave bowls which are really used to hold hot bowl like a hot pad. They wrap around the bowl and then let you go sit in your favorite chair in front of the TV or with a good book and not burn yourself. I love it. I already made another on so both me and my husband can have one. Sweet!


Monday, December 19, 2011

December Christmas 2011 Party

Jean Crossno hosted the Guild Christmas party. We all  brought dishes. Well .....(except me) I sneaked into Walmart and picked up a fruit and vegetable tray. They let me eat with them anyway.
Here we are enjoying all our good food. It was a dieters nightmare but we all survived. After the wonderful dinner we all adjourned to the living room where we had a short show and tell.
Viola Rodgers conducted the meeting even tho she tried to pass herself off as being Jean Crossno. Jan shared with us some snow flakes that she was making for Christmas gifts.
She's got Janette holding the square up for her. These squares were done with lame and antique silk that Jan had acquired and been keeping for a number of years. The squares were all hand quilted. She said that the silk is just amazing to quilt.
Close up of Jan's work. Jan is an award winning quilter.

 Patsy brought along a pillow that she had made where she did tucks and folded to make an interesting design.
Melissa brought  some toilet paper snowmen that she had made that was embellished with embroidery and had hats fashioned with sweater arms and it all went over a roll of toilet paper. You may notice that I have not included a picture of these snowmen. I confess that I was so busy looking at them that I forgot to take the pictures. So there you have it. Till next month. Happy quilting!